Flutter 佈局基礎 ——Stack 層疊佈局#
層疊佈局適用於子視圖疊放在一起,且位置能夠相對於父視圖邊界確認的情況。
比如,可用於圖片上加文字,按鈕上加漸變陰影等等。
Stack Widget 的子視圖要麼是positioned,要麼是non-positioned。Positioned子視圖是指使用Positioned的 widget 包括起來的子視圖,通過設置相對於Stack的top、bottom、left、right屬性來確認自身位置,其中至少要有一個不為空。
Stack Widget 的大小取決於所有non-positioned的子視圖。non-positioned的子視圖的位置根據alignment屬性確定,(當alignment為left-to-right時,子視圖默認從左上角開始;當aligment為right-to-left時,子視圖從右上角開始;)。
Stack 基礎使用#
Stack 常用屬性#
- Stack 常用屬性
- children:子視圖
- alignment:子視圖的對齊方式
- topLeft:頂部左對齊
- topCenter:頂部居中對齊
- topRight:頂部右對齊
- centerLeft:中間左對齊
- center:中間對齊
- centerRight:中間右對齊
- bottomLeft:底部左對齊
- bottomCenter:底部居中對齊
- bottomRight:底部右對齊
- clipBehavior,裁剪,可能會影響性能
- Clip.hardEdge: Stack 默認為此選項
- Clip.antiAlias: 平滑裁剪
- Clip.antiAliasWithSaveLayer
- Clip.none: 不需要裁剪
- fit:子視圖填充方式
- StackFit.loose: 使用子組件的大小
- StackFit.expand: 充滿父視圖的區域
- StackFit.passthrough: 透傳,使用 Stack 的父視圖的佈局方式
- textDirection
- TextDirection.ltr
- TextDirection.rtl
Positioned 常用屬性如下:
- Positioned 常用屬性
- child
- height
- width
- bottom
- left
- right
- top
alignment 對齊#
使用代碼如下:
class MyApp extends StatelessWidget {
  @override
  Widget build(BuildContext context) {
    var stack = new Stack(
      alignment: Alignment.bottomRight,
      children: [
        new Container(
          width: 300.0,
          height: 300.0,
          color: Colors.orange,
        ),
        new Container(
          width: 200.0,
          height: 200.0,
          color: Colors.green,
        ),
        new Text(
          'alignment bottomRight',
          style: TextStyle(color: Colors.white, fontSize: 21),
        )
      ],
    );

    return MaterialApp(
      title: 'StackView Widget',
      home: Scaffold(
        appBar: new AppBar(
          title: new Text('StackView Widget'),
        ),
        body: Center(
          child: stack,
        ),
      ),
    );
  }
}
效果如下:
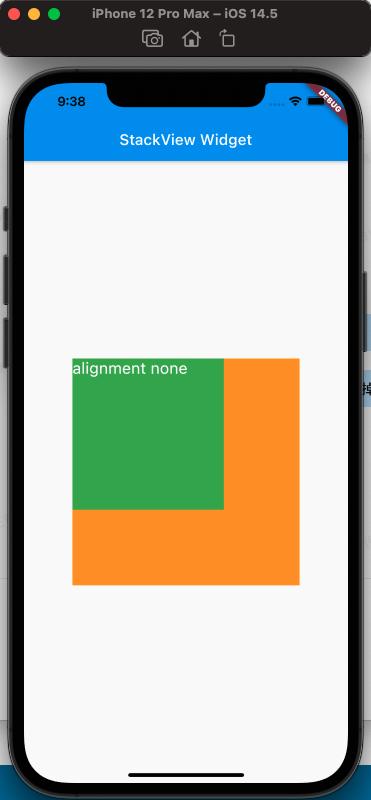
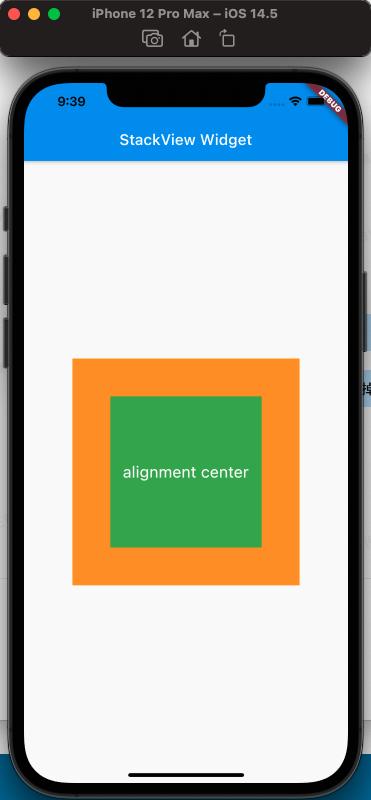
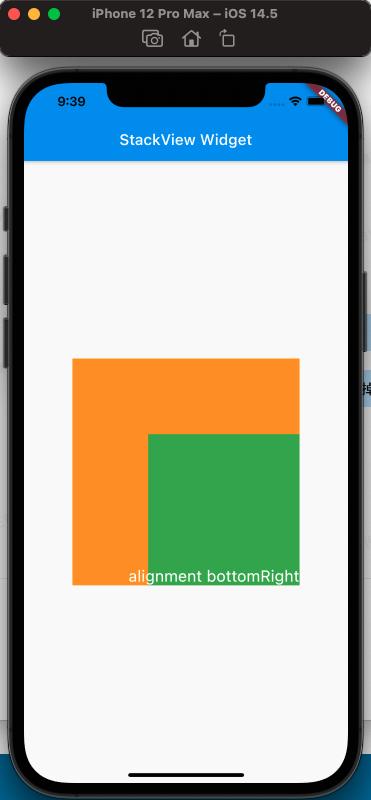
從上面的對比,可以看出alignment的屬性,對設置Stack的子視圖的效果
clipBehavior 屬性#
為了方便查看clipBehavior的效果,需要寫一個相對於Stack超出的子視圖,使用Postitioned Widget,設置 top、left 為負值即可。
代碼如下:
class MyApp extends StatelessWidget {
  @override
  Widget build(BuildContext context) {
    var stack = new Stack(
      clipBehavior: Clip.antiAliasWithSaveLayer,
      children: [
        new Container(
          width: 300.0,
          height: 300.0,
          color: Colors.orange,
        ),
        Positioned(
            child: new Container(
              width: 200.0,
              height: 200.0,
              color: Colors.green,
            ),
            left: -20,
            top: -20),
        new Text(
          'clip antiAliasWithSaveLayer',
          style: TextStyle(color: Colors.white, fontSize: 21),
        ),
      ],
    );

    return MaterialApp(
      title: 'StackView Widget',
      home: Scaffold(
        appBar: new AppBar(
          title: new Text('StackView Widget'),
        ),
        body: Center(
          child: stack,
        ),
      ),
    );
  }
}
效果如下:
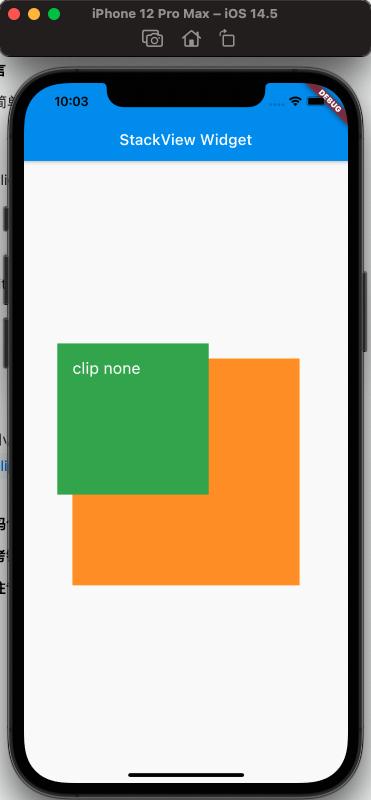
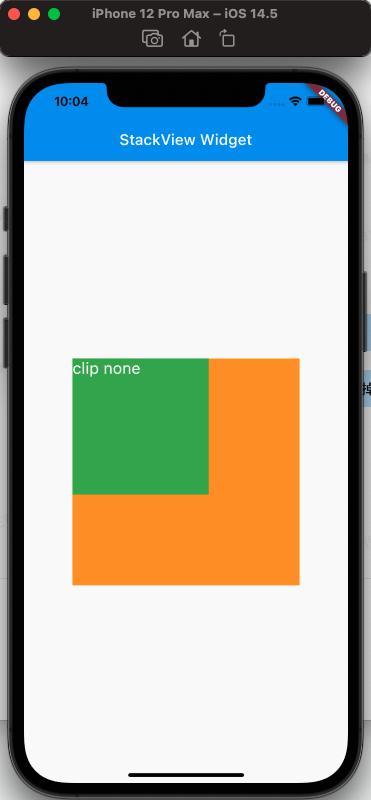
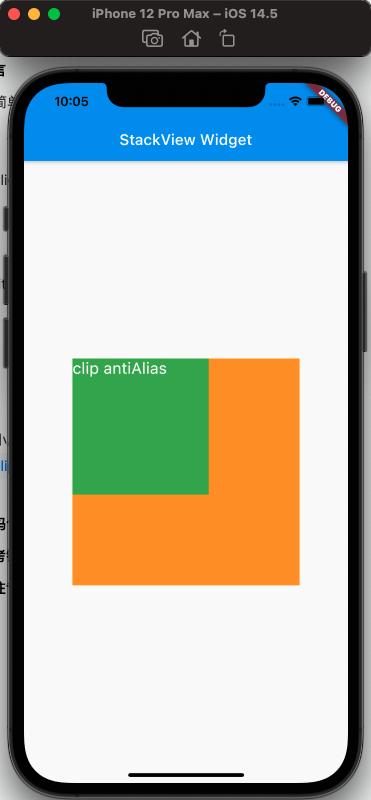
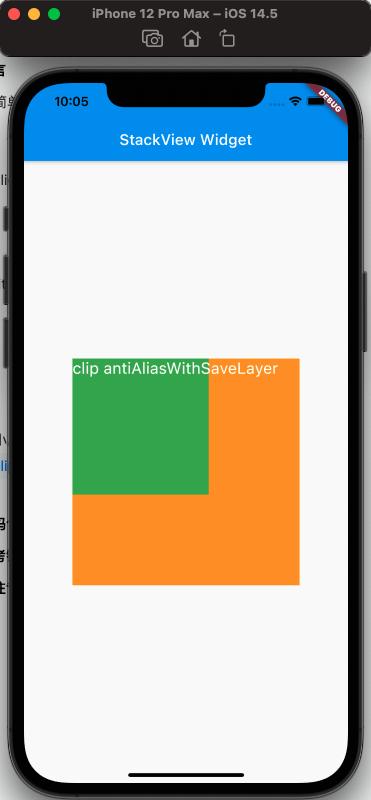
從上面可以看出clipBehavior的效果
fit 屬性#
fit 填充方式,fit 的 expand 和 loose 屬性很容易區分,但是 loose 和 passthrough 屬性的區別需要特別注意。為了容易區分出不同,這裡使用Row作為的父視圖Stack。
簡單的理解,expand 是充滿父視圖;loose 是按照子視圖的大小來;passthrough 則是按照父視圖的父視圖的約束來。
使用代碼如下:
class MyApp extends StatelessWidget {
  @override
  Widget build(BuildContext context) {
    var stack = new Stack(
      // alignment: Alignment.bottomRight,
      fit: StackFit.passthrough,
      children: [
        new Container(
          width: 300.0,
          height: 300.0,
          color: Colors.orange,
        ),
        new Container(
          width: 200.0,
          height: 200.0,
          color: Colors.green,
        ),
        new Text(
          'StackFit passthrough',
          style: TextStyle(color: Colors.white, fontSize: 21),
        ),
      ],
    );

    return MaterialApp(
      title: 'StackView Widget',
      home: Scaffold(
        appBar: new AppBar(
          title: new Text('StackView Widget'),
        ),
        body: Center(
          child: Row(
            children: [Expanded(child: stack)],
          ),
        ),
      ),
    );
  }
}
效果如下:
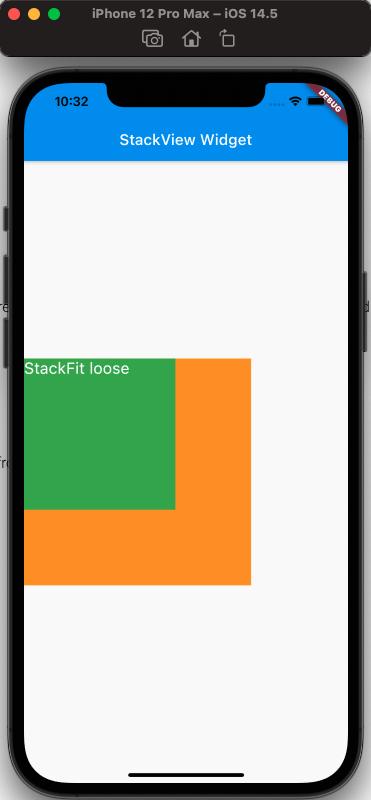
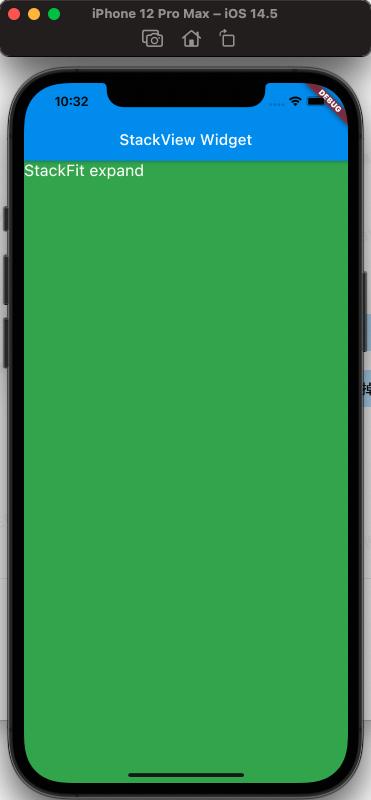
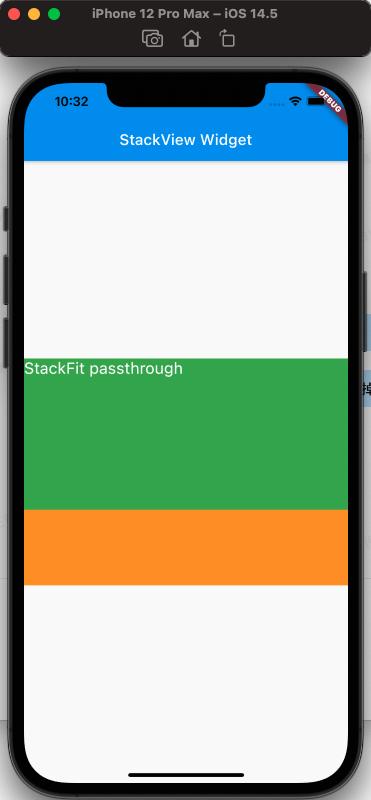
從上面可以看出,StackFit 為 passthrough 屬時,使用了 Row 的 Expand 的佈局;StackFit 為 loose 時,使用的是子視圖的佈局;StackFit 為 expand 時,使用的是 Stack 的佈局。
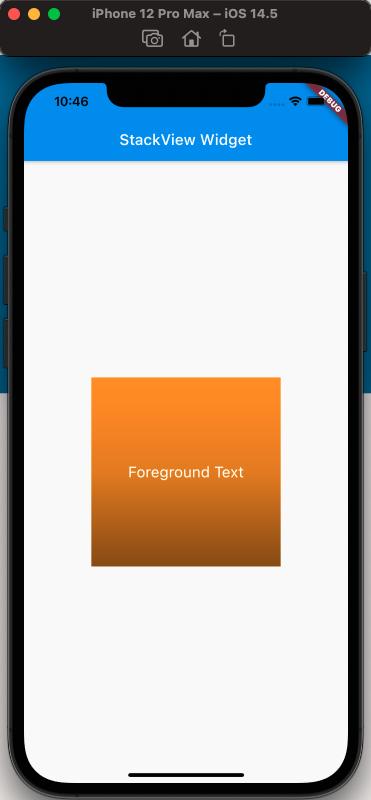
使用 Stack 實現漸變背景的效果#
代碼如下:
class MyApp extends StatelessWidget {
  @override
  Widget build(BuildContext context) {
    var stack = SizedBox(
      width: 250,
      height: 250,
      child: Stack(
        children: [
          Container(
            width: 250,
            height: 250,
            color: Colors.orange,
          ),
          Container(
              padding: const EdgeInsets.all(5.0),
              alignment: Alignment.center,
              decoration: BoxDecoration(
                  gradient: LinearGradient(
                colors: [
                  Colors.black.withAlpha(0),
                  Colors.black12,
                  Colors.black45,
                ],
                begin: Alignment.topCenter,
                end: Alignment.bottomCenter,
              )),
              child: const Text('Foreground Text',
                  style: TextStyle(color: Colors.white, fontSize: 20.0))),
        ],
      ),
    );

    return MaterialApp(
      title: 'StackView Widget',
      home: Scaffold(
        appBar: new AppBar(
          title: new Text('StackView Widget'),
        ),
        body: Center(
          child: stack,
        ),
      ),
    );
  }
}
效果如下:
參考#
Stack Dev Doc
Positioned Dev Doc
StackFit Dev Doc
Flutter 免費視頻第三季 - 佈局