Flutter レイアウトの基本 —— カスタム BottomNavigationBar#
背景#
ここでは、不規則な BottomNavigationBar を実装してみます。まず、2 つのシステムコンポーネントを理解します: floatingActionButtonとBottomAppBar
floatingActionButton#
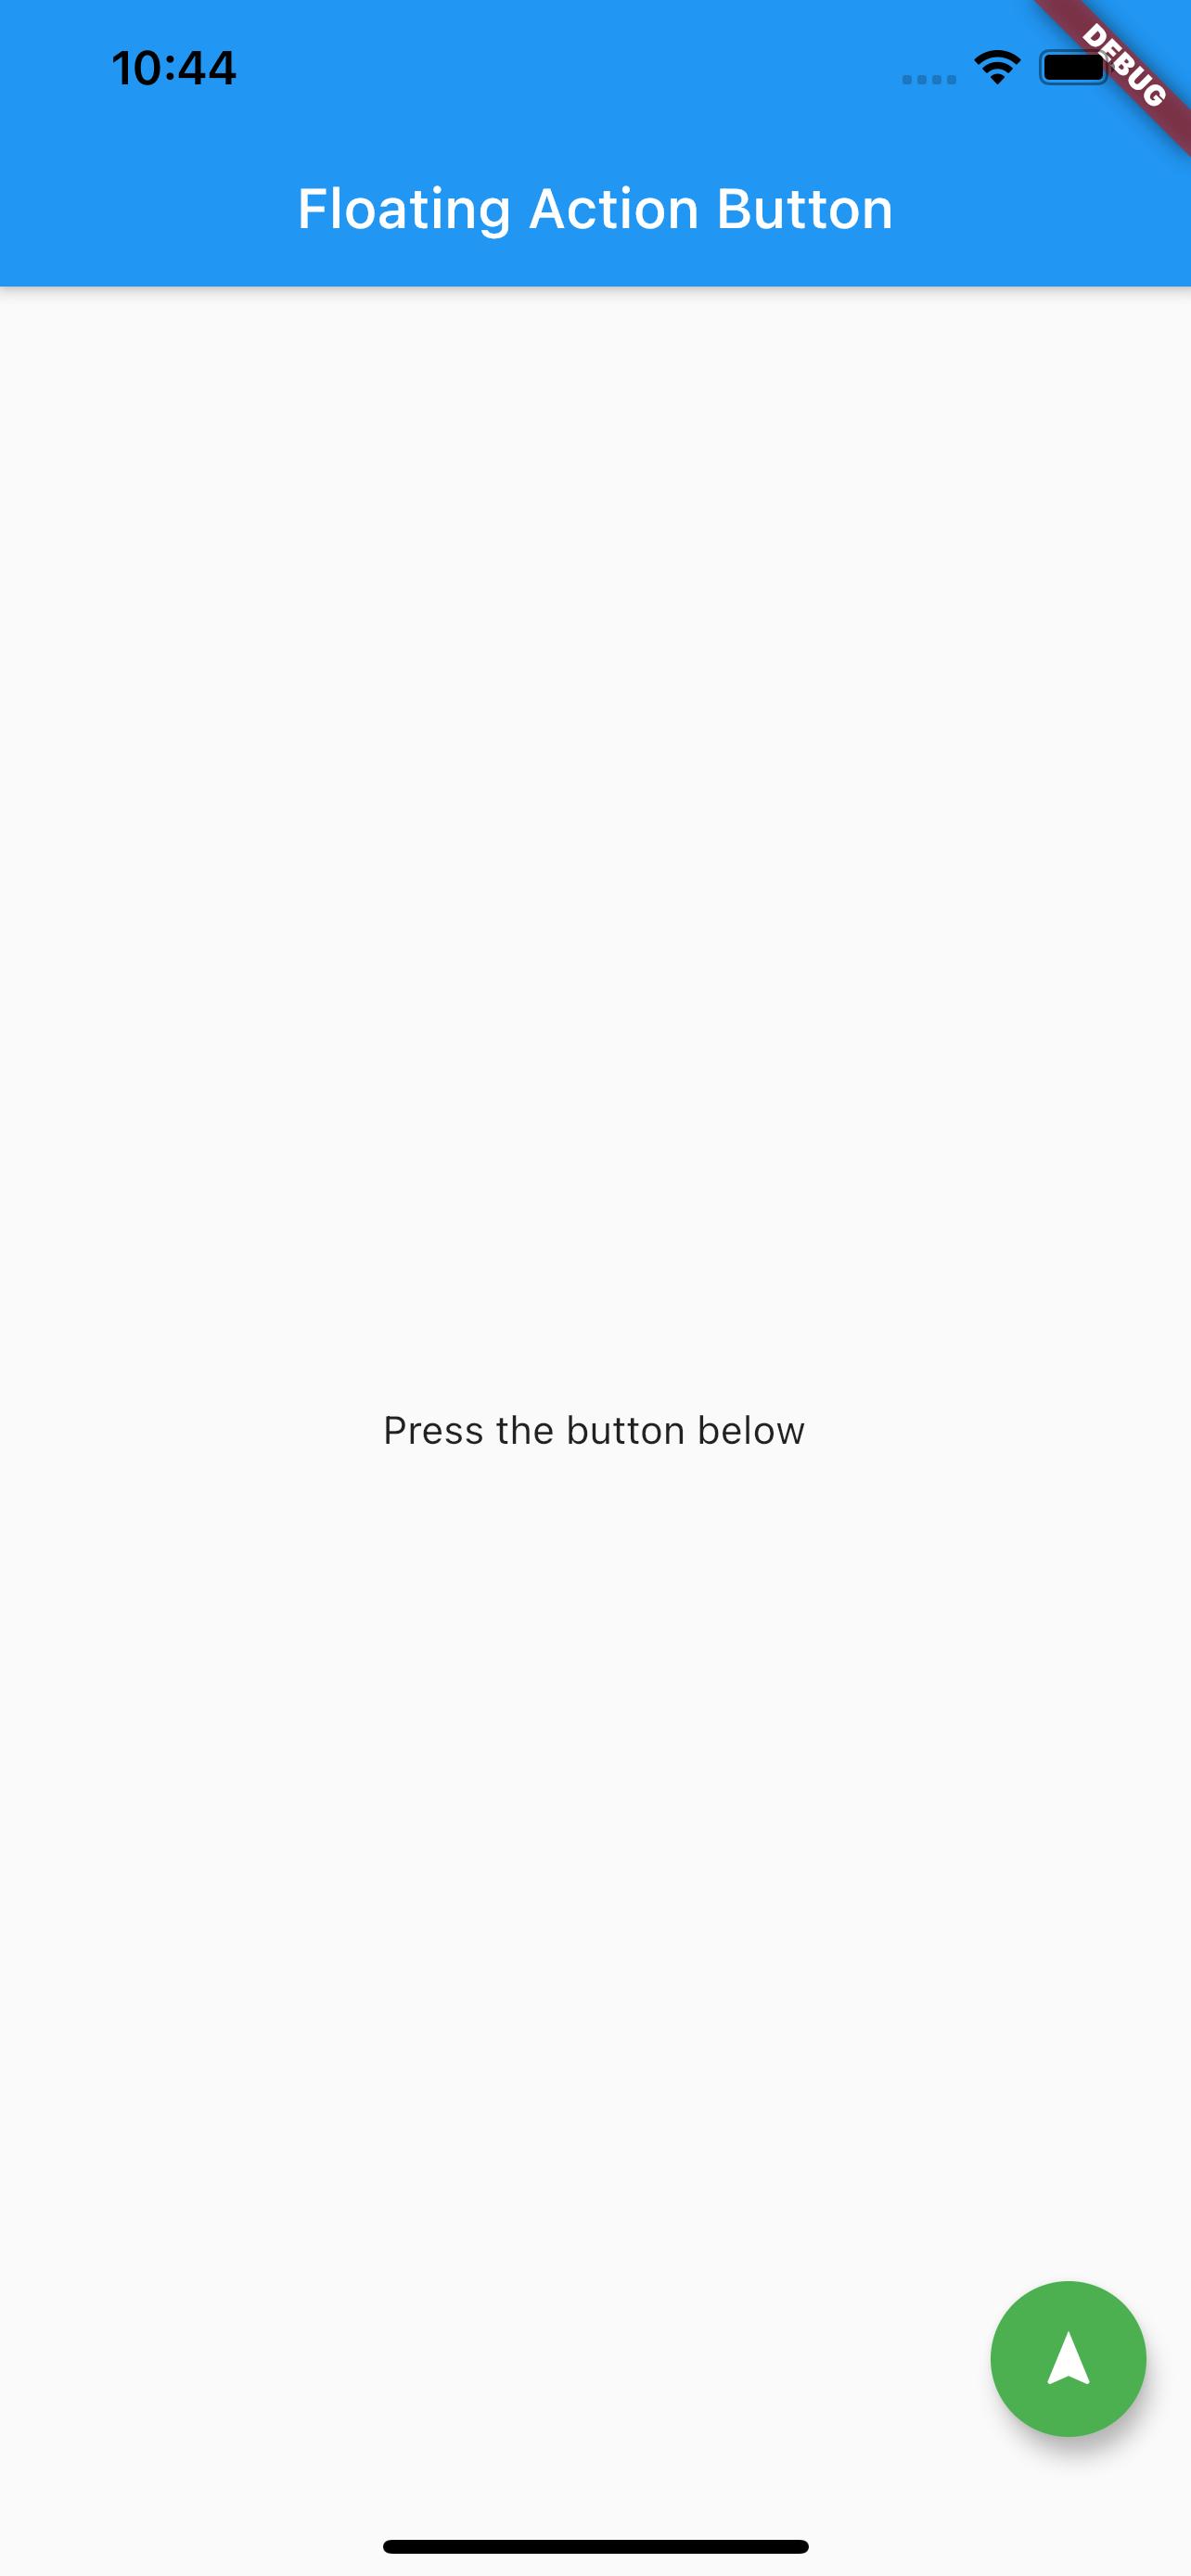
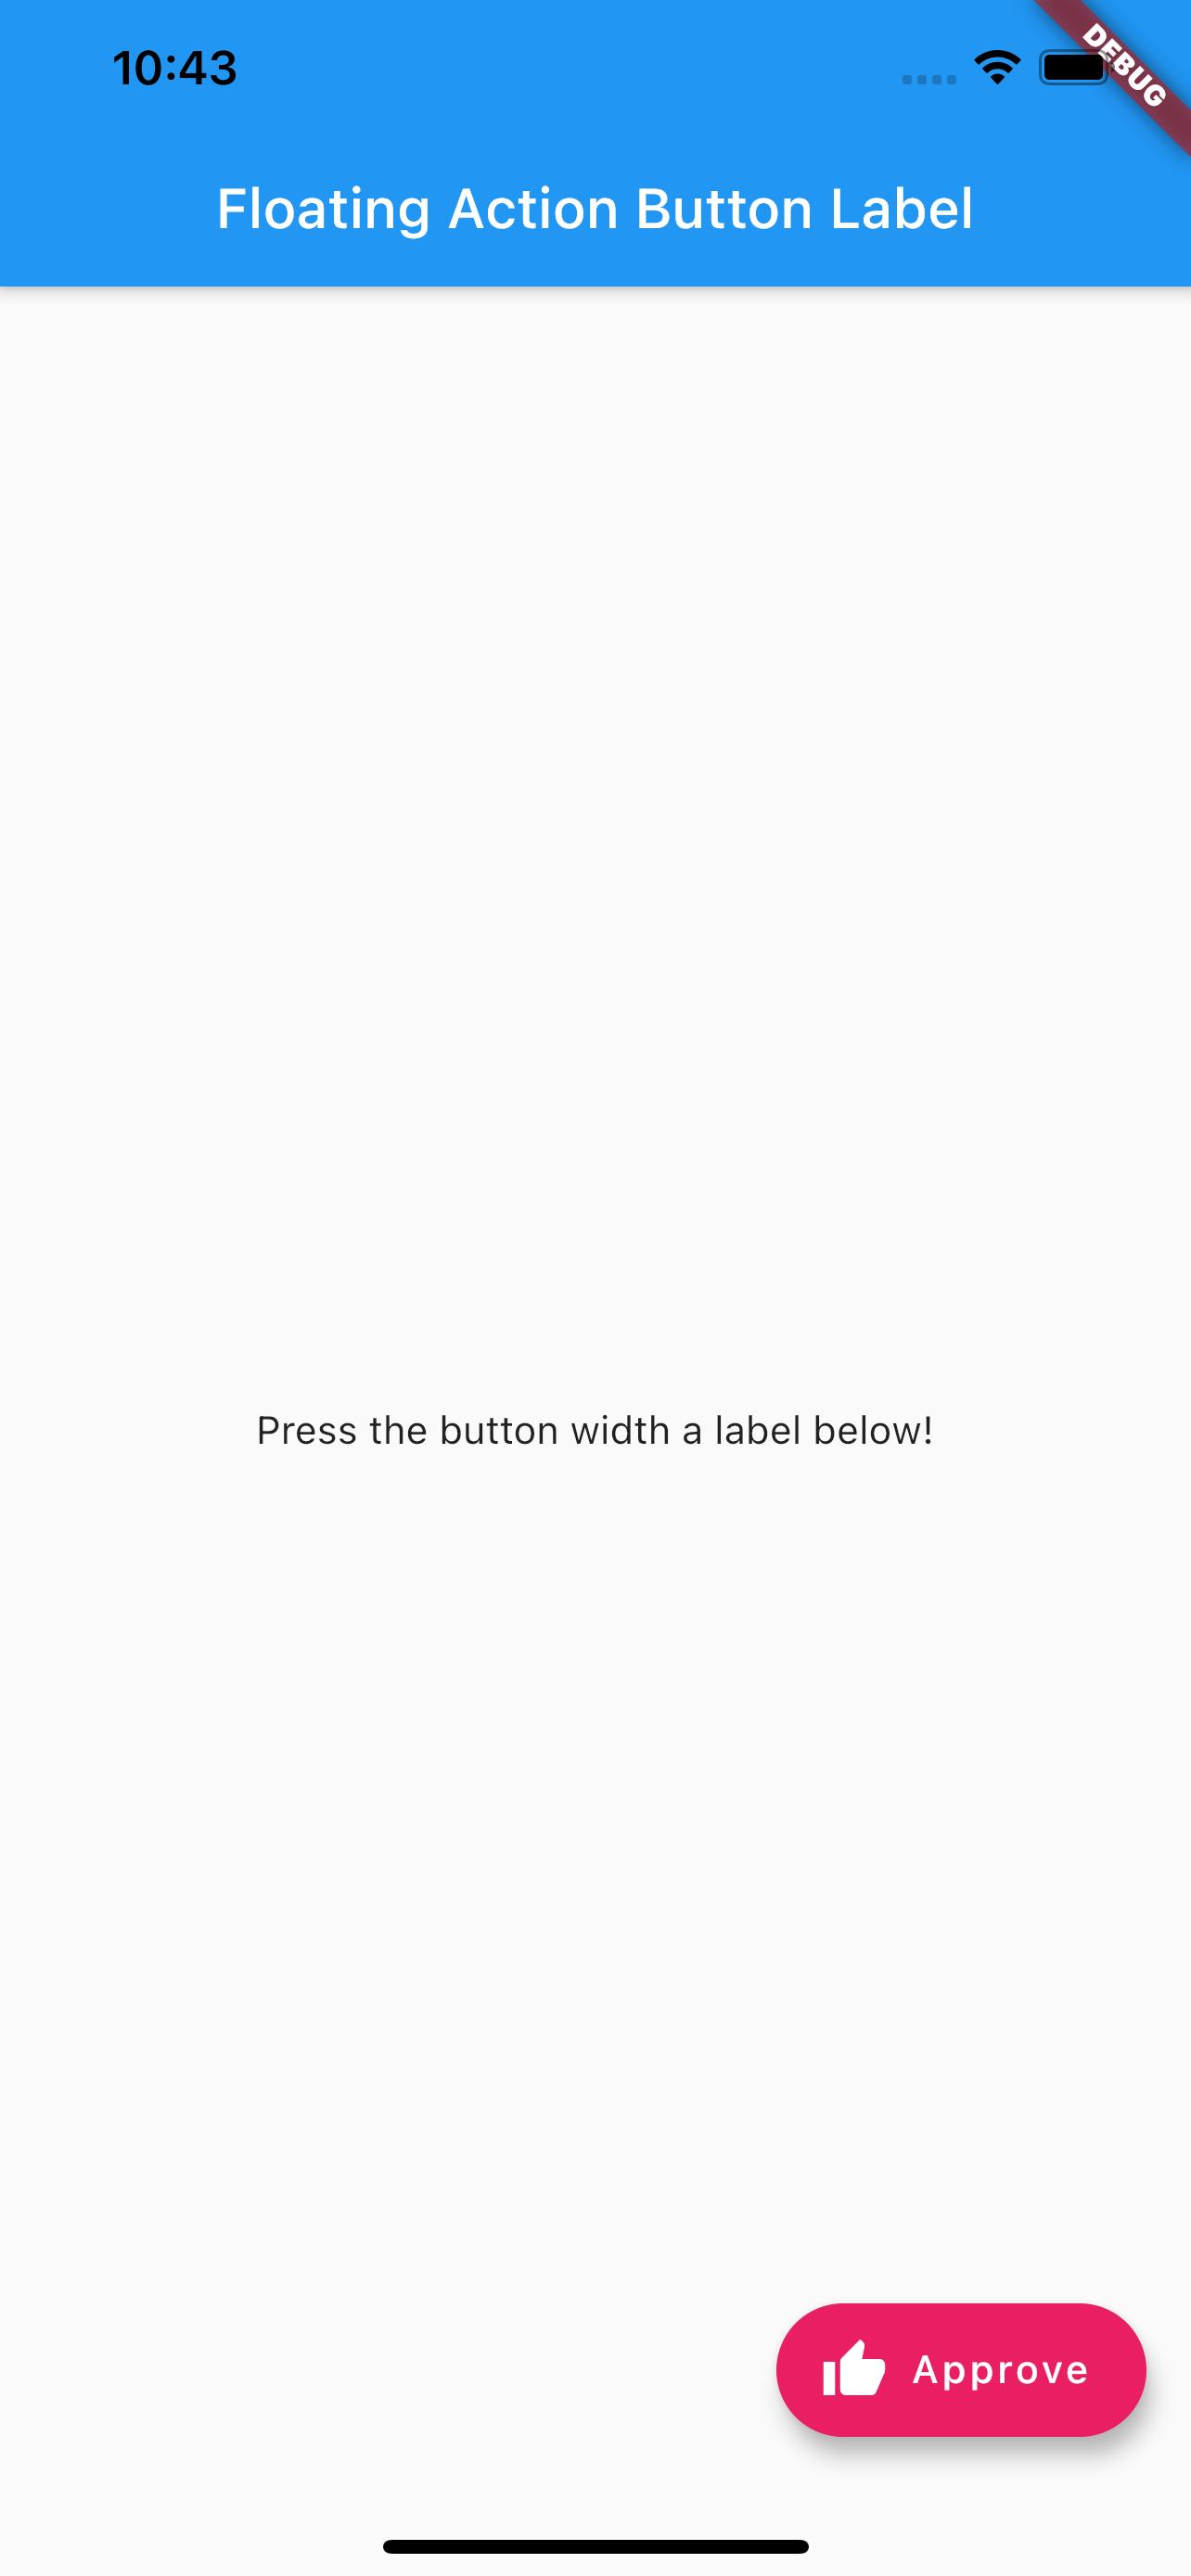
floatingActionButtonは、浮動ボタンを作成するために使用され、2 つのスタイルがあります:1 つは円形の純粋なアイコンで、もう 1 つは楕円形のアイコンまたはテキスト付きです。
以下はその例です:
void main() => runApp(const MyApp());

/// これはメインアプリケーションウィジェットです。
class MyApp extends StatelessWidget {
  const MyApp({Key? key}) : super(key: key);

  static const String _title = 'Flutterコードサンプル';

  @override
  Widget build(BuildContext context) {
    return const MaterialApp(
      title: _title,
      home: MyStatelessWidget(),
    );
  }
}

/// これはメインアプリケーションがインスタンス化するステートレスウィジェットです
class MyStatelessWidget extends StatelessWidget {
  const MyStatelessWidget({Key? key}) : super(key: key);

  @override
  Widget build(BuildContext context) {
    return Scaffold(
      appBar: AppBar(
        title: const Text('浮動アクションボタン'),
      ),
      body: const Center(
        child: Text('下のボタンを押してください'),
      ),
      floatingActionButton: FloatingActionButton(
        onPressed: () {
          // ここにonPressedコードを追加してください!
        },
        child: const Icon(Icons.navigation),
        backgroundColor: Colors.green,
      ),
    );
  }
}
表示効果:

void main() => runApp(const MyApp());

/// これはメインアプリケーションウィジェットです。
class MyApp extends StatelessWidget {
  const MyApp({Key? key}) : super(key: key);

  static const String _title = 'Flutterコードサンプル';

  @override
  Widget build(BuildContext context) {
    return const MaterialApp(
      title: _title,
      home: MyStatelessWidget(),
    );
  }
}

/// これはメインアプリケーションがインスタンス化するステートレスウィジェットです
class MyStatelessWidget extends StatelessWidget {
  const MyStatelessWidget({Key? key}) : super(key: key);

  @override
  Widget build(BuildContext context) {
    return Scaffold(
      appBar: AppBar(
        title: const Text('浮動アクションボタンラベル'),
      ),
      body: const Center(
        child: Text('下のラベル付きボタンを押してください!'),
      ),
      floatingActionButton: FloatingActionButton.extended(
        onPressed: () {
          // ここにonPressedコードを追加してください!
        },
        label: const Text('承認'),
        icon: const Icon(Icons.thumb_up),
        backgroundColor: Colors.pink,
      ),
    );
  }
}
表示効果:

BottomAppBar#
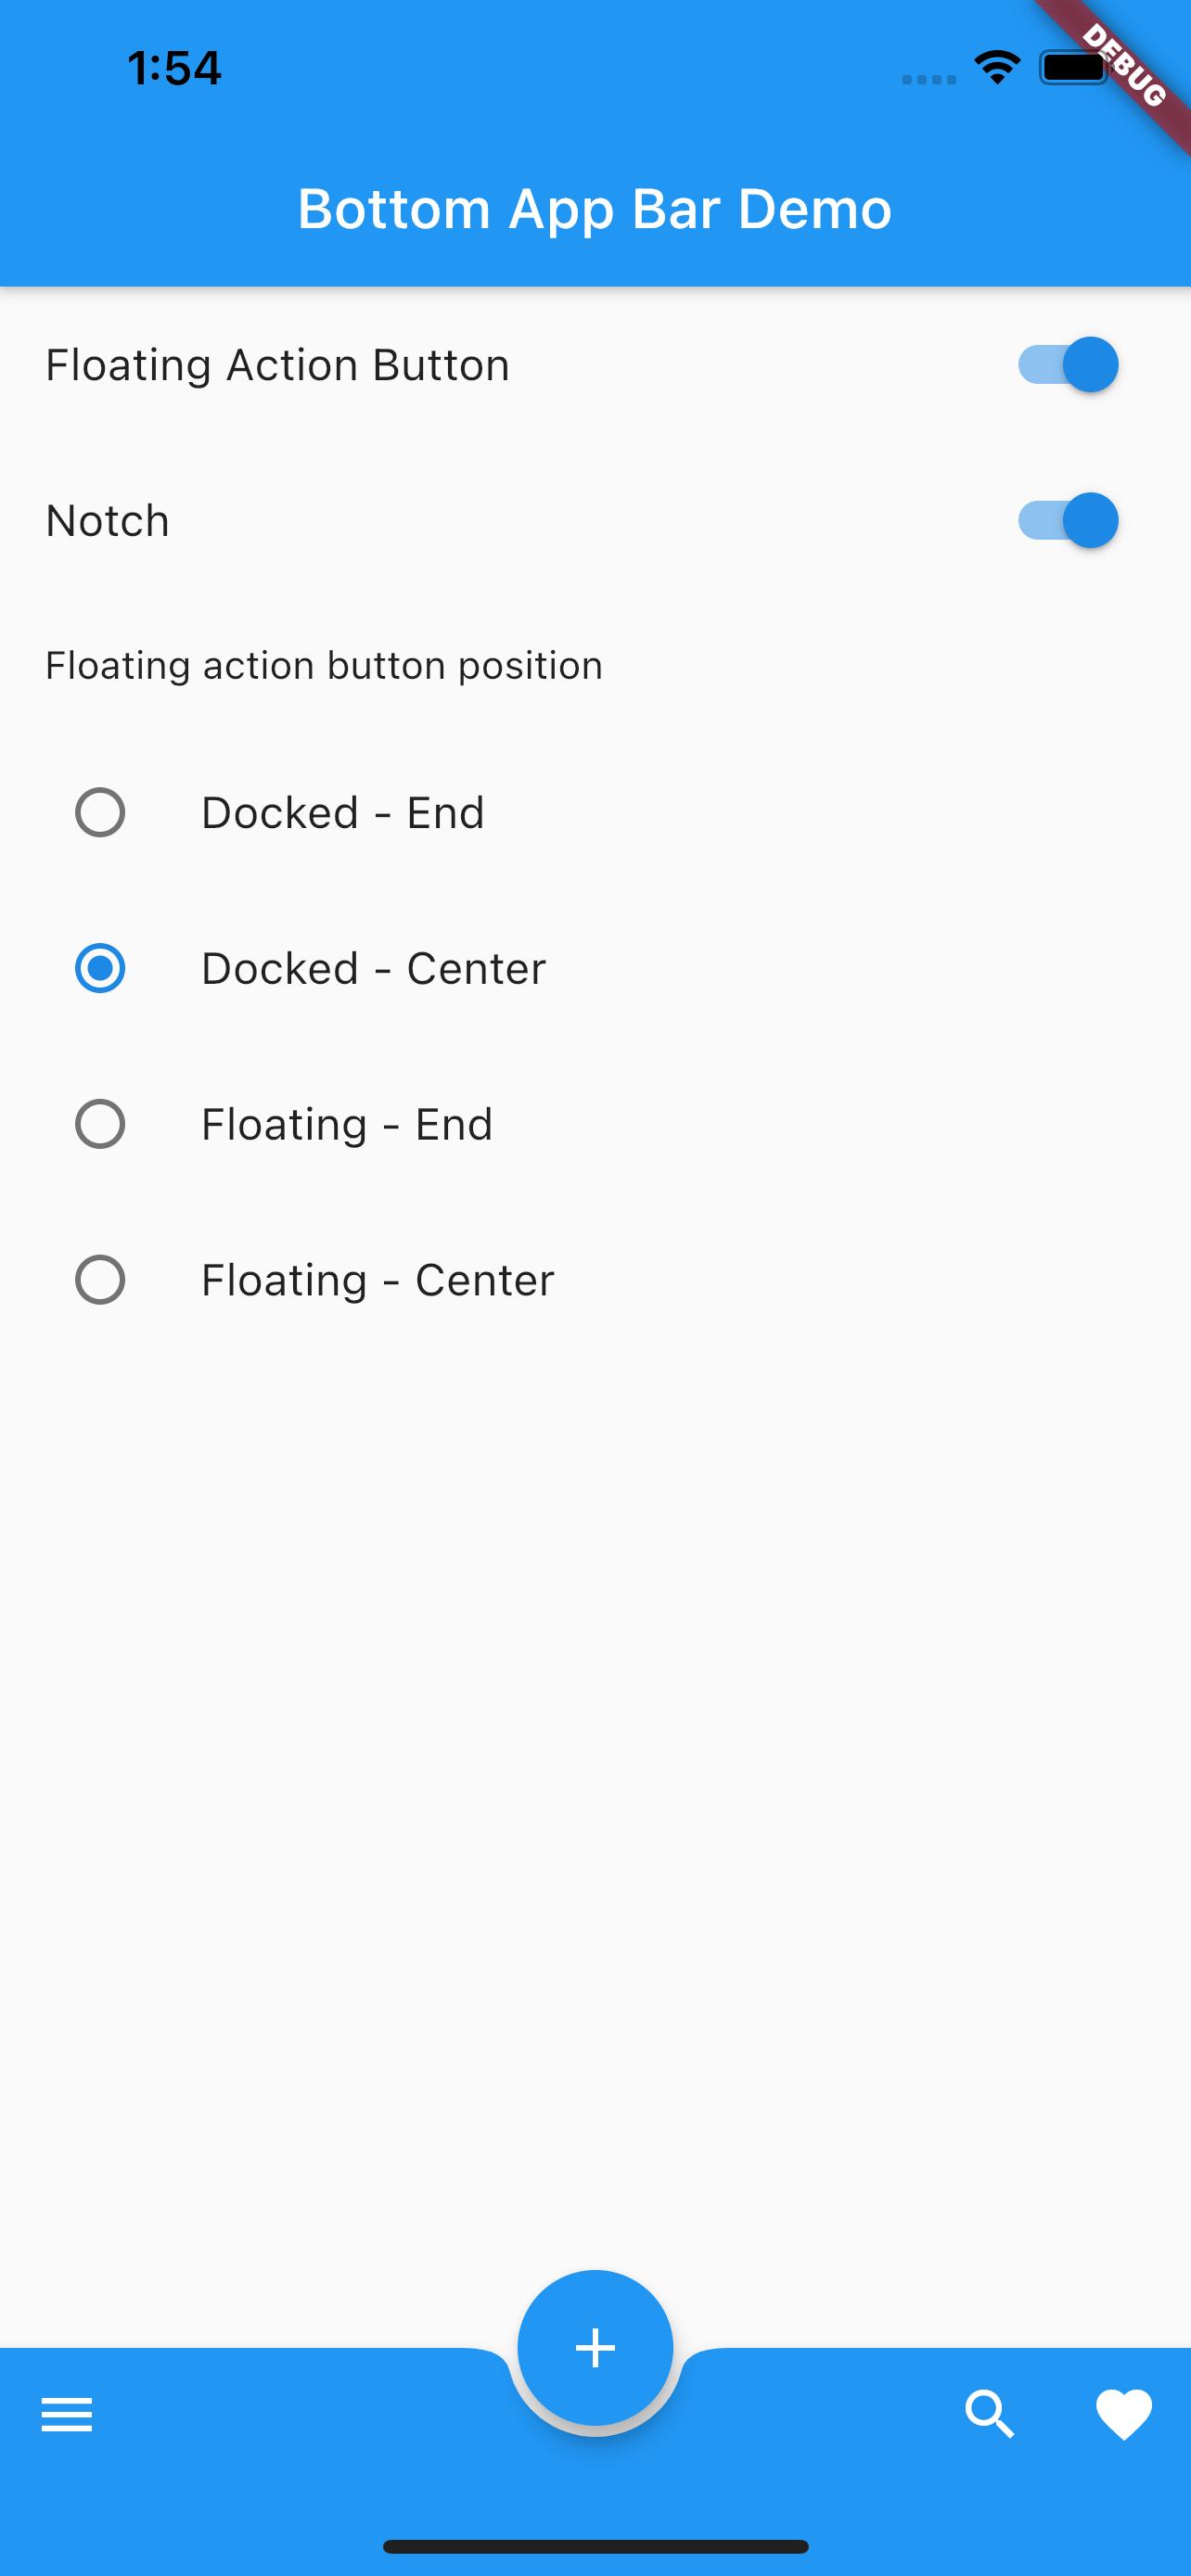
実現したい効果は以下の通りです:

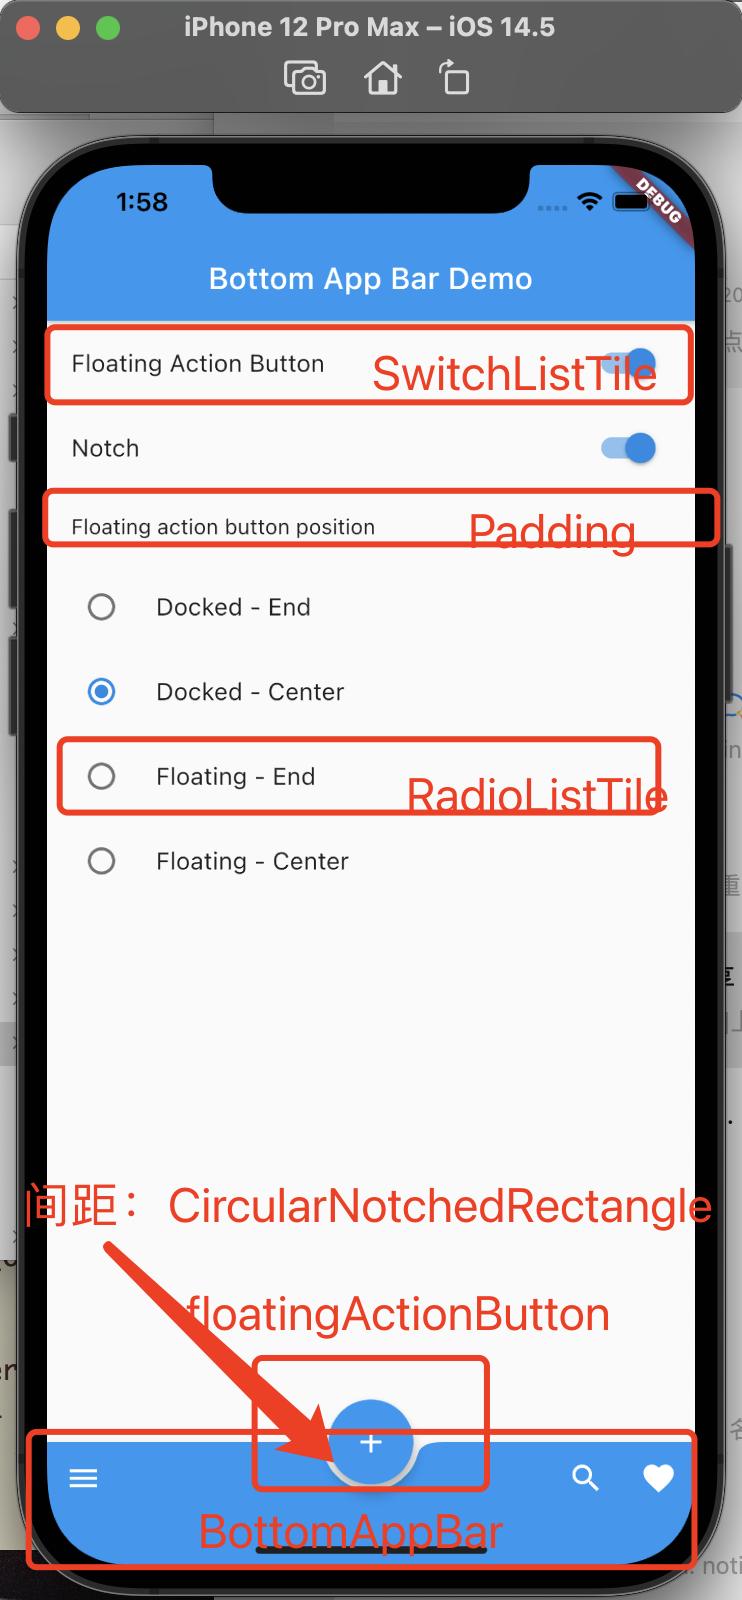
次に、実現方法を分析します:
body は ListView で、ListView の内容は上から下に次のようになります:
- 2 つの
SwitchListTile - 1 つの
Padding - 4 つの
RadioListTile
次にfloatingActionButton
次にBottomAppBar
以下のようになります:

コードは以下の通りです:
void main() {
  runApp(const BottomAppBarDemo());
}

class BottomAppBarDemo extends StatefulWidget {
  const BottomAppBarDemo({Key? key}) : super(key: key);

  @override
  State createState() => _BottomAppBarDemoState();
}

class _BottomAppBarDemoState extends State<BottomAppBarDemo> {
  bool _showFab = true;
  bool _showNotch = true;
  FloatingActionButtonLocation _fabLocation =
      FloatingActionButtonLocation.endDocked;

  void _onShowNotchChanged(bool value) {
    setState(() {
      _showNotch = value;
    });
  }

  void _onShowFabChanged(bool value) {
    setState(() {
      _showFab = value;
    });
  }

  void _onFabLocationChanged(FloatingActionButtonLocation? value) {
    setState(() {
      _fabLocation = value ?? FloatingActionButtonLocation.endDocked;
    });
  }

  @override
  Widget build(BuildContext context) {
    return MaterialApp(
      home: Scaffold(
        appBar: AppBar(
          automaticallyImplyLeading: false,
          title: const Text('Bottom App Barデモ'),
        ),
        body: ListView(
          padding: const EdgeInsets.only(bottom: 88),
          children: <Widget>[
            SwitchListTile(
              value: _showFab,
              onChanged: _onShowFabChanged,
              title: const Text('浮動アクションボタン'),
            ),
            SwitchListTile(
              value: _showNotch,
              onChanged: _onShowNotchChanged,
              title: const Text('ノッチ'),
            ),
            const Padding(
              padding: EdgeInsets.all(16),
              child: Text('浮動アクションボタンの位置'),
            ),
            RadioListTile(
              value: FloatingActionButtonLocation.endDocked,
              groupValue: _fabLocation,
              onChanged: _onFabLocationChanged,
              title: const Text('ドッキング - エンド'),
            ),
            RadioListTile(
              value: FloatingActionButtonLocation.centerDocked,
              groupValue: _fabLocation,
              onChanged: _onFabLocationChanged,
              title: const Text('ドッキング - センター'),
            ),
            RadioListTile(
              value: FloatingActionButtonLocation.endFloat,
              groupValue: _fabLocation,
              onChanged: _onFabLocationChanged,
              title: const Text('浮動 - エンド'),
            ),
            RadioListTile(
              value: FloatingActionButtonLocation.centerFloat,
              groupValue: _fabLocation,
              onChanged: _onFabLocationChanged,
              title: const Text('浮動 - センター'),
            ),
          ],
        ),
        floatingActionButton: _showFab
            ? FloatingActionButton(
                onPressed: () {},
                child: const Icon(Icons.add),
                tooltip: '作成',
              )
            : null,
        floatingActionButtonLocation: _fabLocation,
        bottomNavigationBar: _DemoBottomAppBar(
            fabLocation: _fabLocation,
            shape: _showNotch ? const CircularNotchedRectangle() : null),
      ),
    );
  }
}

class _DemoBottomAppBar extends StatelessWidget {
  const _DemoBottomAppBar({
    this.fabLocation = FloatingActionButtonLocation.endDocked,
    this.shape = const CircularNotchedRectangle(),
  });

  final FloatingActionButtonLocation fabLocation;
  final NotchedShape? shape;

  static final List<FloatingActionButtonLocation> centerLocations =
      <FloatingActionButtonLocation>[
    FloatingActionButtonLocation.centerDocked,
    FloatingActionButtonLocation.centerFloat,
  ];

  @override
  Widget build(BuildContext context) {
    return BottomAppBar(
      shape: shape,
      color: Colors.blue,
      child: IconTheme(
        data: IconThemeData(color: Theme.of(context).colorScheme.onPrimary),
        child: Row(
          children: <Widget>[
            IconButton(
              tooltip: 'ナビゲーションメニューを開く',
              icon: const Icon(Icons.menu),
              onPressed: () {},
            ),
            if (centerLocations.contains(fabLocation)) const Spacer(),
            IconButton(
              tooltip: '検索',
              icon: const Icon(Icons.search),
              onPressed: () {},
            ),
            IconButton(
              tooltip: 'お気に入り',
              icon: const Icon(Icons.favorite),
              onPressed: () {},
            ),
          ],
        ),
      ),
    );
  }
}
floatingActionButtonLocationの設定に注意してください。